You’ve sorted your artwork, the graphics have been printed, but now you need to decide how to best mount your signage. We look at the options available to you for 3 of our most popular signage materials.
How to Mount Correx Signs
Due to Correx being extremely lightweight, it can be mounted to many surfaces with ease. Methods of mounting include; drilled holes, tape, glue, cable ties, Velcro, rope, or a wire frame. The option you choose to take will depend on the desired mounting time, and the way the mounting option will change the exterior appearance of your sign.
Drilled Holes

You can drill holes with ease, and in turn use either screws, bolts, rope or cable ties. Cable ties and ropes will be used through the holes to typically mount onto a fence or similar surface.
Screws and bolts can be placed through the holes and tightened as normal to create a secure mount. However, with Correx you can mount directly onto a penetrable surface with the use of nails since the corrugated plastic board should not rip or tear at the entry of a nail, thereby negating the need to drill holes in the first place.
Once you have mounted your Correx onto something with more structure you can attach it to a wooden post, creating post mounting. Perfect for real estate agents, and shows.
Non-Destructive Options
Your mounting choices that will not deface the front of your sign include; tape, glue, and Velcro. All these forms of mounting use some kind of adhesive to create a connection between the surface and the board. Double-sided tape and glue are the simplest of these choices; however, they are difficult to adjust without damaging your sign once contact between the two surfaces has been made. Velcro will allow you to easily readjust your sign with ease thanks to its design.
Furthermore, you may choose to mount your Correx board with a specially designed frame or stand. This is more expensive, but more be better suited to your requirements. Examples of this are a wire-based frame or plastic stake with a slip in design
Correx is one of the most common forms of temporary signage. Formed of corrugated plastic it proves a flexible, weather resistant product that is extremely lightweight.
How to Mount Foamex Signage
There are several different mounting options for Foamex, and your choice may depend on the amount of time you wish to have the board in place, or how the mounting will affect the look of your sign.
Your Foamex mounting options include; drilling holes, an easel or display frame, adhesive/glue backed, or Velcro.
Drilled Holes
Because Foamex is a more durable material it can have holes drilled into it with ease. Allowing you to use several forms of fixings to mount your sign; screws, bolts & washers, string, rope, bungee cord, or cable ties.
To use screws and bolts, simply ensure that the surface is suitable and screw in through your pre-drilled holes. Additionally, you may choose to attach a post to the mounted surface creating sign post mounting for your Foamex, this is a typical usage scenario for estate agents for sale boards and outdoor trade show events
As mentioned, other options include putting some form of cord or rope through the drilled holes. Loop the chosen material through the holes and then hang on to a peg or bolt. These options will work well and last for some time; however, they will not give the cleanest of finishes and may detract from your desired look.
Display Stand or Adhesive Backing
For a cleaner and much simpler finish we recommend using one of the following; an easel, some form of adhesive, or Velcro. Because Foamex is extremely lightweight it will be able to have its weight sustained by all of these options with ease. An easel or display frame is simple enough to mount on, set up the frame and place your sign on it.

When using adhesive you must ensure that both the board and the desired mounting surface are clear of all dust, dirt and grime. Then apply the adhesive as instructed. Be careful with this option as it may be challenging to adjust the sign once the two surfaces make a connection.
Velcro may be the most straightforward of them all. Ensuring both the mounting surface and the Foamex are clean, then apply the Velcro’s adhesive to both surfaces or as instructed. Once you are sure the Velcro is applied firmly to each surface; freely attach and detach the board, adjusting to your desired final position.
Foamex is a lightweight and durable expanded foam PVC board. This makes it stiffer than Correx, and allows it to be more robust with a longer-lasting result.
Acrylic is the heaviest of all three options discussed; however, it is still lightweight and easy to work with for mounting. The mounting options will be similar to that of Foamex and Correx. However since Acrylic boards are typically used for more professional environments, we will also discuss additional options that reflect this.
How to Mount Acrylic?
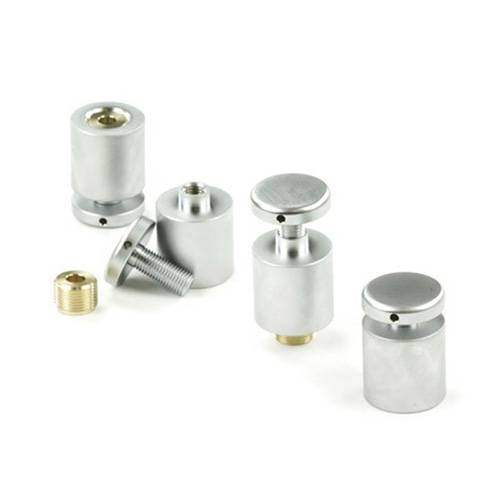
Our recommended method for mounting Acrylic signage is to use standoffs. These required holes drilled into the sign itself, and into the mounting surface, this can be done with a simple household drill.
Once the holes are drilled, you must attach the standoff’s anchor into the mounting surface, ensuring the attachment is secure. Then follow this up by attaching the sign to the anchor and then screwing in the standoff cap to form a secure and professional mount.
Other options will include drilling holes if you wish to use a screw or bolt to secure to a penetrable surface or if using fasteners such as cable ties, rope, and bungee cord
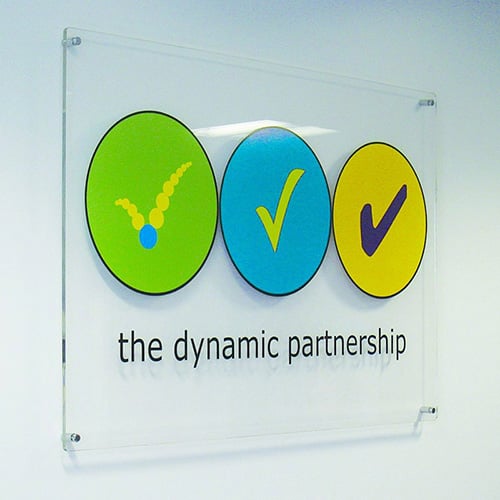
Since Acrylic boards are still lightweight you can also use Velcro and double-sided tape. However, since acrylic boards are usually see through with a logo printed onto them, these options will be seen through the sign, and therefore are only really suitable where there is printing covering the entire board.
Acrylic is a hard plastic and is often used as a more durable alternative to glass, being lighter and shatter resistant while still being 100% transparent; also know as Plexiglass or Perspex.
You’re All Set!
Now you should have all you need to decide the best way to mount your sign. If you have any questions about methods or materials we haven’t covered, leave a comment below.